Recipe: a Paleo dairy-free and nut-free cheese alternative

There are stacks of dairy-free ‘cheese’ recipes online and in books now. Some taste good and some taste nothing like cheese of course. Some are easy to make, some are really hard work.  Plus, most are made using nuts and not everyone can tolerate nuts well. Like me!

Most of my recipes are derived from a desire to create Paleo-friendly nut-free dishes for those who are allergic, don’t feel good eating many nuts, or just want nut-free alternatives. Especially important for school lunchboxes!

Last year I was introduced to an amazing dairy-free nut-free melting cheese recipe thanks to the legendary Aussie Paleo Chef (as known on Facebook, but just ‘Dan’ to us!) which goes brilliantly in Paleo burgers, in lasagne and on my chicken parmie recipe (in my soon-to-come Banana Flour e-book!!) and one of my fave recipes to teach people at private cooking workshops, always crediting back to the man himself of course!

If you’d like to grab his melting cheese recipe just download the Paleo Kitchen Creations e-book and enjoy the deliciousness!

So since learning that recipe, using it a lot and loving it.. I wanted to create a cheese that didn’t work only melted and could be spread onto crackers like regular animal milk-based cheese. One day I got creative in the kitchen and came up with a winner, using similar ingredients to Dan’s recipe, but slightly different. Of course though, me being me and not always organised in the kitchen, I didn’t write down the recipe as I went and couldn’t then remember the ingredients or method afterwards therefore I couldn’t replicate it so I could give it to you guys! Oh believe me, I tried! And failed… many times.

I’d almost given up but decided recently to have another crack.. and whad’ya know.. success!

I’ve finally created a spreadable cheese alternative recipe! I’ll be honest though, it doesn’t taste like real cheese, no cheese substitutes do. But, it’s a really healthy alternative and something interesting to include at dinner parties, as a snack, whenever you’d usually use cheese really.

Since it isn’t cheese and doesn’t taste exactly like cheese, let’s not call it “cheese”. Because that’s a fib after all! Instead, how ’bout we call it.. Cheezy Paleo Spread as it does have a likeness to cheese but it’s not the same as it, and that’s kinda cheezy I think! 😉

Cheezy Paleo Spread image

Ingredients you’ll need:

1/2 cup organic desiccated coconut

1/2 cup arrowroot flour

1 tbsp grass-fed pure beef gelatin powder (grab some via our affiliate link here)

2 tbsp spring/filtered water

1/2-1 tsp turmeric powder – depending on how yellow you want your cheez

1 tbsp apple cider vinegar

1 tbsp Niulife creamed coconut (not coconut cream/milk, but dried coconut processed to become ‘creamy’)

Himalayan salt to taste


Kitchen bits you’ll need:

Good blender (high speed, bullet, or glass with decent power)

Whisk

Measuring spoons and cups

Round or square/rectangle container lined with baking paper or plastic wrap. Plastic wrap will probably allow for creases to appear around the edges of the cheez but that’s not necessarily a bad thing!


Steps to follow:

  1. In a small saucepan add 1 tbsp water and gently sprinkle gelatin powder evenly over the surface. Do not turn the stove on until the gelatin powder has absorbed some of the water and has ‘bloomed’.
  2. Turn heat to medium and whisk the liquid so all gelatin granules have dissolved. Remove from the heat and set aside
  3. Add to the blender add all remaining ingredients then drizzle the gelatin water on top
  4. Place the lid on the blender and blitz on high to break down the desiccated coconut and combine everything well. You can blitz until you reach a very smooth consistency or stop before it reaches that if you prefer the texture of some of the coconut remaining
  5. As you’re blending feel free to add a smidge more water (as in 1 tsp at a time) in case the mixture is too thick and isn’t combining properly. This can depend on your blender. Basically, you’re after a well combined and thick mixture with no lumps of creamed coconut or arrowroot remaining
  6. Once it’s to your liking use a silicon spatula or food processor scraper (food processor scrapers seem to work perfectly for getting around all the grooves in blenders!) to remove the mixture and transfer to the lined container
  7. Gently tap the base of the container on a steady surface like a chopping board to help the mixture spread to the corners and settle evenly
  8. Place in the fridge for a couple of hours to set
  9. When it’s time to serve, take it out of the fridge, grab the plastic or paper to remove it all from the container then remove the paper/plastic so you’re left with a big chunk of yellow cheez
  10. Serve on a platter with crackers spread out around, or cut to smaller sizes if you wish. Keep in mind on a really hot day outside the cheez may melt because of the coconut oil and gelatin but it will take a while to melt completely. Use a butter knife to spread onto crackers or slide carrot sticks into it. Easy!
  11. Store in the fridge in an air-tight container or wrapped in plastic. It contains gelatin which is an animal product so it will spoil after a few days as with any animal product. The apple cider vinegar will help preserve it to an extent but if the smell or colour changes please discard it.

Enjoy!

The recipe for the Rosemary Crackers (in the image) will be in my Banana Flour e-book, so be sure to keep an eye out for that.. launching in February 2016, yay!

Cheezy Paleo Spread image (1)

I hope you enjoy creating and eating this recipe, please do let me know what you think!


Here are some answers to some questions I may get after sharing this recipe:

  • Why not use nutritional yeast? I have experimented with it many times and every time it leaves my stomach very bloated and gassy the next day. From what I’ve read about it, it’s so processed and unnatural in its useable state that it easily messes with digestion. And don’t we mostly go Paleo to improve gut health?! Feel free to use it if you can tolerate it well but remember it could have inflammatory effects. It would replace turmeric for the yellow effect but turmeric is so healthy!
  • Why use gelatin? Pure gelatin is so healing (so it’s actually good for digestion!) and helps create the texture of this cheez
  • Could I use other types of dried coconut? Yes but the larger the pieces the longer they’ll take to break down enough in the blender.

Let me know if you have any questions to add!

Thanks,

Aimee xx


5 Things I’m Grateful For:

  1. Our long weekend away in NSW going to a family wedding, seeing new places and staying with amazing friends
  2. The sun out today so I can get some Vitamin D!
  3. Healthy recipe creating
  4. All Dan’s wonderful advice and inspiration
  5. You guys reading our blogs!

Recipe: Easy Paleo Honey No-Soy Chicken

At our last meetup on the weekend Clint and I took along a few paleo goodies for t he picnic, and the honey soy chicken I made was a huge success.


Especially with my little friend Lachy who has a lot of food allergies and often can’t eat much at meetup picnics. I always try to include something he can have and this time he scoffed down the chicken, with a big smile on his cute little face. So I thought I’d better get this super easy, tasty recipe up on the blog for more people to enjoy!


Remember… my recipes are pretty much always really simple and easy, I’m not into overly fancy meals because often a lot of ingredients with a lot of processes involved in putting them together can  be confusing on the gut. So if you like my kinda view of cooking then you’ll like my recipes.. I hope 😉


HONEY NO-SOY CHICKEN

Pollo a la soja, miel y limn

Preheat oven to 180 degrees Celcius

You’ll need:

2 x free-range chicken breasts

3 tbsp coconut amino (for nightshade-free I use Matakana range available here, but otherwise use Niulife or a similar brand)

IMG_20150710_111018

2 tbsp local raw honey

Salt and pepper to taste

Optional: crushed garlic, ginger

 
Do this:

For the time-poor folk…

1. Cut chicken into strips or cubes and place in a deep oven dish

2. Add the coconut amino, honey and salt/pepper

3. Get your hands in there and mix thoroughly so the sauce is coated evenly over the chicken

4. Place in the oven, uncovered, and set the timer for 20 minutes. Then at 20 minutes get the tongs or a large spoon and mix the chicken around so the inside raw pieces move to the outside and all chicken cooks properly

5. Place back in the oven for another 20 or so minutes or until all chicken is cooked through

6. There’ll be a lot of liquid at the end but I like using this as sauce for pouring over veggies as it can be placed in a container in the fridge and used later, or it can be simmered down on the stove right away to thicken up. Add some arrowroot to create a honey soy gravy

7. Store chicken in an airtight glass container in the fridge. It’s great served cold! If you include the liquid, you’ll find it’ll become jelly once refrigerated, yay!

Now for those with more time up their sleeves…

1. Follow steps 1-3 as above but then place in a container in the fridge for a few hours to marinate. This will infuse the flavours into the chicken more

2. Then cook and store as mentioned above

How easy is that!?!

It will go great sided with cauli rice, veggie mash or mixed into a salad
Enjoy 🙂

Aimee


5 Things I’n Grateful For Today:

1. A fun meetup at the Glasshouse Mountains and people enjoying my food

2. The 30 mins of magical #NakedSunTime I just got on the balcony

3. Wrestling Clint yesterday and finally getting him to the ground, woo!

4. My ‘Cowgirl’ mug cos it’s cool!

5. Country music

Beating those pesky Winter Blues

With the sudden onset of this current cold snap throughout New South Whales and southern Queensland it seems like Winter has finally arrived, especially because up until this point we were experiencing pretty mild temps really. In general though, the colder months and shorter days tend to make even the fittest person want to roll over in bed of a morning to stay warm under the blankets or to reach for the extra helping of warm comfort foods during the day.

I call this period of lower motivation the Winter Blues!

Today I want to share 5 quick tips on ways you can overcome the Winter Blues and to make the most out of this time of year…

  1. Sun time – Yes the days are short and cold, but when you manage to get yourself out in the sun sure are in for a treat!


Spend some time each day lying in the sun.  This sun not only helps to warm us up but it’s a great way to get that vitally important Vitamin D; something a lot of people are missing out on in the cooler months of the year.


You can get a really cool phone app called D-Minder which helps track how much Vitamin D you’re getting versus how much you need.

D-Minder_screenshot-208x300

D-Minder is a great app we use often

If you’re brave and have a private spot to sun yourself, consider doing what Daniel Vitalis is promoting at the moment…  the #NakedSunTime Challenge (check it out on social media)!  The aim of this is to expose your whole body to the sun and have no visible tan lines. Not for vanity reasons but purely for the amazing health benefits.

IMG_20150701_134536

naked sun time on the balcony

  1. Play outside – Instead of going to the gym, how about attempting to get outside to play or exercise? This again gets you outside in our natural surroundings and is far more beneficial then working-out inside.


Even if you only do this in your lunch break it’s a great way to get the body used to the colder weather.

20150526_164018

playgrounds aren’t just for kids! take advantage of one near you

Stuck for ideas on what to do? Click here for some inspiration


  1. Expose the body to the cold – Yes, you read that right! More often than not people feel the cold and rug up as much as possible to make themselves feel toasty warm. Why wouldn’t you?!


I enjoy doing this too, of course, but this year I’ve made a conscious effort to let myself be exposed to the cold weather more often than usual. I do this by going barefoot outdoors, trying to minimise the use of my jumpers and even jumping into the cold water at the beach.

barefoot winter

barefoot…


winter sunrise

to watch the sunrise on a chilly winter’s morning

The reason I do those things is to build up my tolerance to the cold weather. It’s a new thing for me this year and already I’ve noticed my usual sissy attitude to the cold has improved.


So why don’t you give it a go?


  1. Work-out and play in a group – It’s much easier to face the cold and work-out if you’re with a group of people. The motivation you can give each other, the ideas of things to do, team work is really helpful at this time of year!
_2014_PI_061

get your friends involved for some fun outdoors

Find a group of friends who are willing to face it with you and get moving together.  If you don’t have keen friends or colleagues, you can always join our Primal Fitness Class


  1. Warm up by a fire – This is one of my favourite things to do in Winter! If you have the space at home outside, consider getting yourself a brazier or fire pit and sit around it at night.


It’s a great feeling to sit around with the orange glow in the night. It’s a terrific way to have some down-time from the busyness of our daily lives and helps us reconnect and converse with friends, family and our loved ones.

IMG_20150702_215444

a brazier like ours is about $20 from Bunnings

For bonus points head straight to bed after a fire without turning the house lights on.  The orange glow of the fire will make you nice and sleepy so you should be out like a light. By avoiding the bright unnatural indoor lights your melatonin levels stay balanced.


You could also consider making healthy marshmallows and roasting them on the fire. Who doesn’t enjoy that?! It’s a nice treat to help you enjoy the experience even more. You can grab the recipe in Aimee’s Sweet Goodness with Gelatin e-book here.

These are a few of my favourite ways to beat the Winter Blues and I hope they help you in some way.  We’d love to hear from you if you have any great suggestions to add to these!

Until next time… move and play lots!

Clint


5 things I am grateful for:

  1. Sunshine
  2. QLD flogging NSW in the State of Origin
  3. Sitting around a nice fire
  4. Going barefoot
  5. The ability to learn

Get grounded without going barefoot

Since my last barefoot-related blog post “Barefoot doesn’t = bogan” I’ve really become a big fan of barefoot. For myself personally, not just because of all the published benefits of it. I already knew how good it was for our health and since I’ve been going barefoot more and more often over the last few months I am totally in-love with walking and moving with no shoes on. Not just on comfy surfaces but almost everywhere. And the soles of my feet are toughening up the more I walk on rough surfaces, meaning I can walk on more rough surfaces and my feet are getting more used to it as I do.

Now.. I much prefer to be barefoot. I’m far more comfortable! Which is a really nice way to be!

IMG_20140515_202009

‘Comfort’ a word I don’t hear used very often. In life we use so many objects and put ourselves in so many situations that cause discomfort. Like high heels, chairs, heavy handbags, intense beauty regimes – none of which are natural for human beings and all of which cause some level of discomfort.

But I can honestly say I feel more comfortable being shoe-less these days.

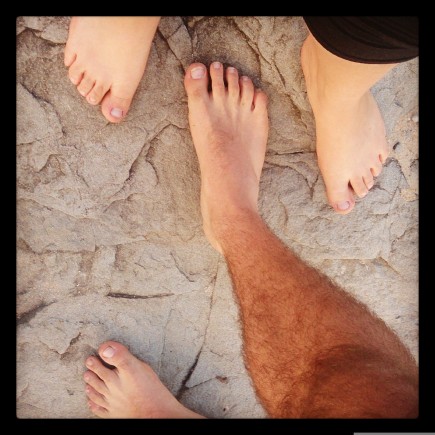
At home (that was an easy one to master), at the beach (well it’s really just wrong to wear shoes on the sand!), walking on different pavement  surfaces (that one took some getting used to!), and even bush walking in our local national parks (sometimes encountering gravel patches.. that one REALLY took some getting used to!!).

And guess what? My heels are not cracked. I don’t have ugly feet. In fact.. my heels are much less cracked than when I used to wear flats to my part time office job before I started working solely from home, the thickness of the skin is increasing, and my feet actually ‘look’ nicer! (not that too many people are grabbing my feet for close inspections of how pleasing on the eye they might be. It’s more for my own opinion).

So you could say the barefoot experiment is going great guns. I love it!

BUT! Yes, there’s a but…

Sometimes barefoot just isn’t ok. Like when it’s bindi season here in South East QLD for example.. barefoot and bindis just don’t mesh. Unless of course you have actual caveman-thick feet and you can’t feel a bindi sticking into your skin. That would be really nice, but I’m not there yet.

And in the middle of Summer when it’s so hot the asphalt roads start to melt and even the lighter colour pavement can burn the sole of a foot to a crisp.. that’s another time barefoot doesn’t work too well.

And.. sometimes a gal just wants to wear shoes and not rock up at a meeting or event foot-starkers! It does happen from time to time!

So there are occasions when footwear is desirable. But when you’ve been going barefoot for a while, totally loving it and totally hating shoes.. what’s one to do?

Go minimal of course!

Most of you guys would have seen someone, at some stage, wearing a pair of Vibram Fiver Finger’s, right? Maybe you passed a jogger wearing them and you did a double-take glance at their feet? Or you met someone like Clint out about, noticed his shoes, and all of a sudden it was the main topic of conversation for the next hour?!

Clint’s worn them for a few years now. They’re his ‘fancy’ footwear. He wears them when he needs to ‘dress up’ for a special occasion (yes, he’s worn them to flash weddings! Luckily his current pair and mostly black and not super noticeable)  and he loves them for the times he can’t go barefoot for whatever reason.

Vibram FiveFingers

They’re probably the most common and well-known form of minimalist footwear.

Some may suggest thongs or sandals would be considered as ‘minimal’ but, in my onion, if they don’t mold to the foot and let the foot move as naturally as possible then they’re pretty much the same as wearing closed-in restrictive shoes. Plus I’ve come across plenty of articles talking about how harmful to our structure and health wearing thongs (or ‘flip flops’ to our American friends) can be. So not only are they not classed as ‘minimal’ but they’re also not great for us.

Then you’ve got the big brand versions such as the Nike ‘Free’ shoes. But they’re still closed in, therefore somewhat restrictive.

There are other types of true minimalist footwear such as Hauraches (tribal sandals, pronounced “hor-arch-eez”) which Clint has always wanted to make, and are essentially a rubber or other mold-able material laced with some type of cord.

Huaraches,_on_ground

The positives of minimalist footwear? Well, heaps…

“The concept of returning to a more natural style of running was popularized by Christopher McDougall’s book, Born to Run. McDougall researched the Tarahumara Indians renowned for their ability to run barefoot for miles. McDougall found that the shorter, more repetitive stride you naturally take when running barefoot eliminated the heel pain he had been experiencing.

How? Running barefoot forces you to land on your forefoot and midfoot instead of your heel, as you do in the longer strides you take in constructed footwear. The result is more efficient transfer of energy; reduced impact on the joints in your feet, ankles, and knees; and strengthening of the muscles in your feet. Many people discover the same benefits McDougall has, which is one of the most compelling reasons so many of our customers are excited to try minimalist footwear.

Another big reason to try minimalist is, quite simply, it’s a lot fun. Having next to nothing on your feet is a liberating feeling that brings you closer to the earth in every way. You’re more aware of rocks, sticks, and subtle changes in terrain, and you can really feel the difference between running on grass, pavement, or dirt. Customers tell us that they feel like kids again and that they just plain enjoy their minimalist workouts more.”  ALL ABOUT MINIMALIST FOOTWEAR – Eastern Mountain Sports

Not only is minimalist and barefoot running and walking better for the body structurally, it’s also more fun, yay!

But one of the big downsides of wearing any kind of shoe – minimalist or not – is the fact you lose out on earthing.

Beautiful, healing, natural, necessary earthing. Being physically connected to the earth and being able to literally absorb it’s healing benefits.

Why would one want to miss out on that when they’re so used to being barefoot and automatically receiving earthing?!

Well, I definitely don’t enjoy wearing shoes knowing I’m not getting earthing. But then I found me Earth Runners and problem solved!

So what’s an Earth Runner?!

Well… a few months ago I stumbled upon a post somewhere on social media showing an image of a pair of sandal-type things that allow earthing through the sole. I don’t remember exactly where I saw it, it was maybe Instagram or Facebook. The company was Earth Runners and the info in the post really interested me so I looked up their website, had a good look, loved what I was reading and decided to get in touch. This mob makes a minimalist shoe that has little copper bits built in to the sole, that allow the earthing energies from the ground to go up into the foot!

Amazing!

The company was nice enough to give me a pair so I could try them out and review them. They seemed really excited to hear an Aussie talk about earthing and loving minimalist shoes, so they were happy to help me out, and I was certainly happy to give them a burl!

I was asked to visit the Earth Runners website (affiliate link) and choose which style and size I wanted. Ooh, shopping online, so fun! I went with the Circadian, conductive with laces and when they arrived I was super pumped! It was still bindi season so this was good timing!

IMG_20150106_134950

My toy, fresh outa the box!

The first surface I wore them on was the tiles inside when I put them on for the first time. I managed to get them on pretty easily the first time but I did need to watch the instruction video just to understand how the laces worked and how to adjust. It was good because it showed me how to trim the excess leather so I didn’t have any lose bits to trip on.

So I walked around the house in them for a few minutes and I have to say.. if you get a pair and you have tiled or polished timber floors, be sure to wear them OUTSIDE first to ‘break in’ the soles so they’re not slippery! As soon as I walked in them on tiles I was slipping! But once I’d been outside on concrete and slightly scuffed the soles, they were fine and never slipped again. Good tip!

Over the last couple of months I’ve worn them on a variety of different surfaces in different conditions so I could become fully aware of their capabilities. Here’s where I’ve worn them and what I thought of those experiences…

Concrete foothpaths – I’ve walked long distances on concrete and found them really comfortable. If a lace isn’t tightened properly though there can be slight rubbing under the foot from walking a long period of time (as with many shoes and sandals) so it’s important to ensure they’re tight enough before setting off. But the clip is so easy to adjust you can tighten or loosen easily at any time. It’s just a flick of a part of the clip, a gentle adjustment of the leather strap then push clip down to secure. Easy!

IMG_20150213_181740

You can just make out the Earth Runner strap tan from my 1hr walk from Mooloolaba Esp to Maroochydore shopping centre on a sunny day!

Dirt and gravel paths – I wore these babies for a big bush walk in Kondalilla National Park a couple of weeks ago which was a good test for them on a variety of surfaces; from dirt/mud to gravel, and rocks. They went great on every single surface, always comfortable, and meant I could walk at a normal pace without the “ouchy ouchy ouchy” reaction of the gravel sections! The only time I took them off was at the bottom of the waterfall where it was all rocks, most wet. I prefer to walk barefoot when I’m climbing and exploring around areas like that. It feels good under my feet and the feedback my senses give me help me with agility and confidence moving across surfaces I’m still getting comfortable with.

IMG_20150210_083617

Testing out walking on rocks during a bush walk in the forest

Grass and sand – during a couple of visits to the country, walking on thick and long farm grass, I found these great. It was hot out there those days, there were lots of sticks, twigs, spiky plants, all sorts of things so for my soles to be protected but my feet not heating up and causing excess sweating or discomfort was terrific. I didn’t need to have closed-in shoes, so just having something under my feet was perfect.

Even just walking near home during bindi season was a blessing; not getting a single prickle stuck in my foot just walking to bring the wheelie bin in, woo!

Walking on sand is probably the most challenging surface because, as with all sandals and thongs, sand gets in between the foot and shoe! That’s just gunna happen, there’s no way to stop that. So just take the shoes off and enjoy the sand under the feet!

Wet – I’ve walked in the rain with them and on muddy and slippery rocks and logs. The tread is terrific. No problems at all.

Summary – so what do I really think of Earth Runners?

Within a couple weeks of wearing the Earth Runners regularly (walking to the shops, bush walking, etc) I noticed they started to mold to the shape of my foot. That’s great, that’s the bomb diggidy when you’re after minimalist footwear! Previously I was wearing Dunlop Volley’s as a minimalist alternative to standard joggers and when Clint was allowed the Vibram Fiver Finger’s in the family! But they only mold very slightly and only inside the shoe. They certainly don’t let the foot move as it should, it’s still restrictive in many ways. It’s a step in the right direction (pardon the pun!) but it doesn’t compare to a true minimalist option.

So I love that the Earth Runners have molded to my feet. They felt comfortable from the very start, but to shape to my foot means when I’m walking in them my feet are really free and moving naturally.

IMG_20150216_142916

Molding nicely to the shape of my foot

I also love that they didn’t rub anywhere unless I hadn’t tightened the straps enough. They didn’t rub on any of the parts of my foot they were touching; between the toes, on two spots on the top of my feet, around the heel, or underneath. Initially I was concerned they would. But the leather is so soft, unlike rubber on thongs, that the straps just felt like part of my feet!

I love that I can walk long distances in them on any surface and not have a sore back afterwards. Which I would get from any other type of shoe. I think because my arches are allowed to be strong and the support for the rest of my body, as they should, there’s no stress on my back. And because the shoes are so thin I’m having to walk almost as softly and gently (i.e. not slapping my foot down hard) as I would if I was totally barefoot. Which prevents a lot of pressure going up into the joints.

I love that I’m getting earthing while I’m wearing them. I’m not missing out on that huge barefoot benefit when I do need something under my feet for protection or comfort.

I love that they look nice. When I want to wear a shoe for the purpose of how I look, these look like a nice pair of sandals. I’ve even had compliments when people have looked down at my feet and said “Oh nice new sandals there!”. They look nice even after I’ve worn them in places that should have made them look worn or dirty – they don’t look dirty and I’ve not once washed them!! Bonus!

I love that they’re made of natural materials. I love that the base is Vibram meaning it’s incredibly durable (some are made with other brand soles but all are top quality and well-known). I love that they’ll last me ages therefore less money being spent on shoes and better for the environment throwing out less things and less synthetic things too!

I don’t do much running, a bit of barefoot technique sometimes in among my play sessions, and these puppies feel great when I do. Just a tip: when ordering online be sure to measure your feet accurately. As opposed to me who accidentally asked for a size slightly too big for my feet. Therefore when I run I need to make an effort to lift my feet a bit higher. Oops. But other than that, they’re amazing for running in!

Basically.. I love everything about them!

I am a big fan of Earth Runners and am more than happy to promote them to anyone and everyone! We are lucky enough to have an affiliate link set up on the website and blog, so you can easily grab a pair through us. We ONLY affiliate with brands we 100% trust and respect. So stay tuned for that!

Want a pair? Grab some here! (affiliate link)

Thanks to Michael and the team at Earth Runners for making these amazing shoes! Love your work guys!

Aimee


5 things I’m grateful for:

1. My pair of Earth Runners!

2. Getting earthing and healing energy from the planet

3. Now being more comfortable barefoot than in cushioned shoes

4. Bush walking

5. Raw honey. It’s really yum!


Live a life of excess in moderation

Before you read any further I must let you know the following information is purely based on my thoughts and ideas.  I have conducted no scientific research into what I am writing about.  Since my works are based purely on thoughts and speculation please let me know if you have more knowledge or any different ideas on the subject.  I’d love to see what others think of this idea.  If you think about this stuff at all?!

So… today I sat down and watched a magnificent video (below) of a man climbing a 40 meter tree to gather honey for himself and his family.  This clip was not only awe inspiring, it got me on to the train of thought that I am currently on.

What if the way we’re currently basing our eating on is in fact not ideal for our species? I hear the same comment over and over again when people are talking about food.

“Everything in moderation is ok” they say.

moderation

But what if our human ancestors did not in fact eat in moderation? What if they lived a life of excess with certain foods? 

And what I mean by the term ‘moderation’ is… consuming a little bit of something most days. As in, “a teaspoon or two of honey every day is healthy because it’s only a little bit of sugar every day. It’s in moderation” for example.

I refer back to the earlier video of the man getting the honey for himself and his family.  In this instance did he display eating honey in moderation? Or did he enjoy as much honey as he could handle (or in ‘excess’)? He worked so damn hard to climb to such a height do you think he only took a little bit, or a lot?  I believe he would of more than likely taken just enough to not only sustain himself and his family but also to ensure the survival of the bee colony. I doubt he would have taken it all and left none.

What about when a small tribe of hunters that brings down a beast?  Do they only eat a little bit of meat? Or do they eat and eat in order to sustain themselves for as long as possible and to ensure that they don’t waste any valuable meat?  Back then I imagine meat would have gone rancid pretty quickly so keeping it for long periods of time was probably not have been an option.  Not to mention the smell of a fresh kill would have woken any animal with a healthy sense of smell.

Or what about the tribes that lived on rivers or lakes where massive amounts of fish and other sea animals would congregate for a short period of time.  Would they display moderation when catching dinner or again would they eat to excess?

So using this idea of excess do we go back to how it once was?  Instead of having a plate with meat and 5 different types of veg, how bout we spend the whole day just eating meat, or the whole day just eating fish, or the whole day eating a couple types of vegetable or even nothing at all! Basically spending a whole day eating something that would have been naturally available to us without all the quick and easy options from the supermarket.

caveman

Maybe our ancestors are like this not by choice, but more so due to their circumstances. Maybe they didn’t end up killing that beast they were hunting all day. Or the fruits and veg they were consuming ended their season. Maybe they were simply eating what was available to them when it was available.

If we adopted this life of excess in moderation and followed this type of eating pattern (meat all day once or twice a week, fruit and veg all day once or twice a week and a day or 2 with minimal foods), what would the effect on us be?  Would it help our digestion? Would it help our gut bacteria? Or would it hinder us in life?

With how we eat now, is our digestion able to really handle the plethora of food and nutrients we’re consuming at each meal?

I’m not naive to the fact that times have changed a lot since this ancient time I’m referring to, but have humans really changed that much, physiologically speaking?

Maybe we not only need to change our eating patterns, maybe we need to include more game meat in our diet and move away from the commercially-produced products like Stuart from Tengeri Natural Fitness has written about here.

bow arrow

What is the answer??? I really don’t know! I just wanted to put it out there as it’s been on my mind a lot lately. I’m always questioning and wondering. I’d love to hear your thoughts.

Clint


5 things I’m grateful for today are:

1. Yesterday’s walk in Buderim Forest Park

2. A new playground I found to hang, swing and climb in

3. Being able to support great local businesses

4. Abundance of healthy food available to me

5. Getting better at handstands!

Natural muscle soothing balm – yep, Aimee’s been at the DIY again!!

A few weeks ago I had sore hammies from gardening so, somehow, I managed to come up with a surprisingly good muscle soothing balm. I know right, I’m a genius..!

But seriously, sore hamstrings from gardening? What the..?! Yep, I know it sounds silly, but I over-stretched the back of my legs while gardening for hours one day because I have a container garden, and the way the pots are all set up makes it hard to get to some of them. I can’t kneel or sit to reach some, which is fine, I don’t mind leaning over while standing, but for long periods of time isn’t so good. I woke up the day after with very sore hamstrings. So sore that I heated up the rice pack and laid it under my thighs for a while.

As I was laying on the lounge though I had a thought. I decided to Google “DIY heat rub” and from a few recipes I found and what from ingredients I had handy, I concocted a mixture that didn’t end up acting as a heat rub but still totally soothed the pain in my muscles.

I was shocked! It really worked! And I’ve used it a few times since just to prove to myself that it really does work and wasn’t just a fluke on the day!

So it was intended to be a heat rub but I find the mixture doesn’t really feel warm when rubbed on. I do find though that it noticeably reduces pain and also the timeframe of the pain/injury all up. I’m pretty darn happy with this little accidental creation and am keen to share it with you, so here’s the recipe…

balm for muscles

Grab these:

1 tbsp cayenne pepper

1 cup oil (I had sunflower oil in the pantry, so that’s what I used. You could also use olive or coconut oil)

1 tbsp beeswax (I used a beeswax tea light candle that was down to the bottom of the wick – $1.50 from Kunara, or buy big chunks beeswax from health food stores and some craft stores)

1 tsp pure spearmint or peppermint essential oil (I only had spearmint available)

1 tsp pure eucalyptus oil


Do this:

1. Place the sunflower oil and cayenne pepper in a small saucepan on low heat (use a saucepan you can keep for this kinda thing as it’ll be really hard to clean afterwards and then use for food!)

2. Let it heat up but not reach boiling, then turn off the heat and leave it there for a few minutes

3. Repeat this a few times (about 5 or 6), stirring occasionally. This will allow the cayenne to infuse without overheating the mixture and causing it to breakdown

4. During the last heating round, stir in the beeswax and let it completely melt

5. Place some muslin cloth folded over 4 times over the top of a jar, secured with a rubber band, then pour the oil mixture into the jar so the muslin catches most of the cayenne. (muslin cloth is only a few dollars per meter at fabric stores)

6. Add in the essential oils and stir through

7. Place the jar in the fridge or just on the bench somewhere to cool down. It’ll eventually cool right through and will set and become firm. It should be a dark orange colour and it’s fine if some of the cayenne got in and settles at the bottom

8. Place a lid on the jar and keep in a cool, dry place away from direct sunlight


Note: If mixture cools down and is runny, return to the saucepan on low heat and add more beeswax. If it’s the opposite and sets too solid then return to the saucepan on low heat and add more oil.


Also, I had added essential oils to the saucepan and realised later when the mixture set that the smells of those oils had reduced, so I figured out it’s best to add those in at the end so they don’t heat up and breakdown.


To use: Rub a 20c piece-size amount onto sore muscles and massage in. It will leave some oil residue but for me I haven’t noticed it leaving any stains on clothing even though it’s a dark orange colour itself. Within a few minutes you may notice muscle pain easing. Even though the mixture to me didn’t feel warm or hot when applied, the properties of the cayenne and essential oils must have a warming and relaxing effect on muscles. Be careful using this on children’s skin and sensitive skin because it may feel hot or may cause a reaction. I don’t have sensitive skin so I’m not sure how someone with it, or children’s skin, would go.


Safety: do not ingest this mixture, keep out of reach of children, label it clearly, if it starts to discolour of go mouldy stop using it and throw it out, test it on your skin first with just a very small amount, if you react badly in any way then stop use immediately. This is only a recipe I made for myself and is only a suggestion of something that can assist in soothing muscle pain, this is not medical advice. Always seek professional medical advice if pain and symptoms persist.


There you have it! Now you have the recipe to make your own muscle soothing balm that’ll hopefully give you some relief next time you strain a muscle in some way. Even if you’ve been sitting at the computer for hours (which is naughty by the way!! Um ma!) and your neck and shoulders are feeling tight, rub some of this on and it might help relax them a bit.

One of the main benefits of making your own concoctions is you know exactly what’s in them and how they’ve been made. You know they’re safe for you and your family. And they didn’t cost the earth. Yay!!

How cool is DIY?! You’re getting a little hooked now aren’t you? Go on, admit it!!

Enjoy guys, and let me know how you go with it 🙂


-Aimee


The five things I’m very grateful for today are:

1. Spending the day with family at the beach, it was perfect weather and so much fun

2. Living on the Sunshine Coast with so many beautiful places to visit

3. My Gelatin Workshop this Sunday!

4. Organic cocoa powder cos it’s pure and delicious

5. Star gazing with Clint the other night in the hinterland with the swag, it was so nice xx

I’ve been at the DIY again! I’ve perfected my natural shampoo and conditioner recipe

A while ago I attempted a new ‘no poo’ recipe in the hopes of finding the right combination of ingredients to make my hair feel healthy, minus any nasty chemicals. Also I wanted something easy to make, easy to use and easy to keep. Who wouldn’t want that with DIY right?!

So I concocted an aloe/gelatin mixture (check out the blog post here) which I was semi happy with… that was until it went off and stunk out the fridge in just a few short days. Fail!

Turns out aloe vera doesn’t last too long in the fridge! So I had to re-think things…

I decided to have another go and, after having been using it to clean and condition my hair with over the last couple of months, I can honestly say I’ve found the recipe I’m totally happy with!

Introducing… my Hair Cleansing Tablets!

jelly 1

Actually I’ve just realised.. this is my 3rd attempt at a natural hair cleaner! I first tried a recipe I found online using coconut milk and aloe vera gel blended and frozen into ice cubes. It claimed to ‘balance pH’ and even though I gave it a good whack of time to see if it’d work, my hair just felt oily all the time. Not cool.

This is what that mixture looked like…

shampoo


Too dry. Too oily.      I want just rightAnd I think I’ve stumbled upon just that!!

<fist bump> !


What’s in them you ask? Not much really! Just a few simple and natural ingredients, with a just-as-simple method of creating them. Here’s the recipe, and yes there appears to be a lot of steps but really it’s a very simple method, I just wanted to explain it properly to you, so it looks like a lot of steps but it’s not really.


Bits and pieces to have handy:

Slow cooker or large cooking pot/saucepan

Whisk

Tablespoon

Knife

Small saucepan

Large measuring jug

Blender

Ice cube trays


Grab these:

A few large sprigs of fresh rosemary

Enough filtered/spring water to fill the slow cooker or cooking pot

Apple cider vinegar (qty will depend on how much water you end up with)

4 tbsp pure grass-fed gelatin powder

1/2 cup pure aloe vera gel scraped out of leaves, discard the green skin. If you can find pure bottled aloe gel, great, otherwise grow some or steal some out of someone’s garden..! 😉


 Do this:

1. Place rosemary and water in the slow cooker, or into a cooking pot

2. If it’s a slow cooker keep on Low temp all day or overnight. If using a pot simmer on Low temp on the stove for a few hours. This ultimately makes rosemary tea!

3. Once made, allow to cool then strain the liquid or just remove and discard of the rosemary leaves. Pour liquid into a large jug with measurements on the side

4. Pour 1 cup of the liquid into a small saucepan

5. Gently and slowly sprinkle the gelatin powder evenly over the whole surface of the water. DO NOT place on heat on stove yet!

6. Let the gelatin mix sit for 10 minutes. You’ll notice it contorts and looks really strange.. this is a gelatin softening method called ‘blooming’. It’s bloomin’ weird I think…!  That’s my version of a ‘dad joke’, I do apologise 🙂

blooming gelatin

7. Once the gelatin has all softened place the saucepan on medium heat on stove top and allow to heat up

8. Whisk until all the gelatin is dissolved. This won’t take long at all

9. Remove from the heat and allow to cool then add to the measuring jug with the rosemary liquid and whisk to combine it all together

10. In the blender add the aloe vera gel and about a cup or so of the rosemary/gelatin liquid. Blend well so there are no chunks of aloe gel remaining. Pour back into the measuring jug

11. Grab the apple cider vinegar and pour in ONE part of that to TEN parts of the rosemary gelatin liquid. That’s the general ratio when adding ACV to water to use for hair, 1 : 10

12. Pour the liquid into ice cube trays and place in the freezer. Once frozen you can pop them out and store in a container in the freezer… and you’re done!


Now you have rosemary, apple cider vinegar, aloe, gelatin cleansing hair tablets! A shampoo and conditioner in one! Woo!

jelly 2


Why this combination of ingredients?

Rosemary and ACV are great for conditioning, while the aloe is a fantastic and gentle cleaner, and the gelatin adds collagen for hair growth and strength. What a combo!!!


To use ’em:

Simply take 1-3 cubes out of the freezer in the morning if you’re washing your hair at night, or at night if you’re washing your hair the next morning, place in a small container of some kind. How many you use will depend on how much hair you have. Short hair and not much of it, use one. Medium hair and lots of it might need two. Long hair 2-3 should be fine

Let them thaw out, they’ll become jelly instead of ice so will hold their shape

In the shower, wet your hair, then carefully rub one jelly at a time through your hair, ensuring you massage into the scalp

Leave it in for a few minutes (if you prefer you can put it in your hair before you get into the shower, particularly if you have water restrictions where you live)

Rinse it all out with warm-hot water so all of the jelly comes out. You don’t want to find dried hard gelatin clumps in your hair later on in the day!!

Use these once or twice a week or as  needed. Easy!


** If you have allergies to any of the ingredients please do not use them. If you notice any adverse reactions at any time of using this recipe please stop using it and seek medical advice. You could always try a test of a small amount of the ingredients on your skin before making this mixture, especially if you’ve never used some of them topically before. Some people have allergic reactions to aloe and herbs in particular so always be cautious trying new natural mixtures on your skin **


I find this mixture cleans my hair really well (and I use oil as my ‘curly hair de-frizzer’ and it completely removes all traces of oil when I wash!) and leaves it feeling soft and shiny.  I use 2 tablets each time because I have medium-length hair and LOTS of it! I’d clean my hair about twice a week and that works for me. You might find you can clean your hair less often, or may need to more often in a week, everyone’s different.

So if you give this recipe a go, let me know what you think! Hope it works for you as well as it works for me 🙂

And YAY for no chemicals!

Enjoy guys!

Aimee


Today I’m grateful for:

1. Spring!

2. Fruit jelly for brekkie

3. Natural skincare and beauty recipes

4. Clint being in this month’s edition of Holistic Bliss magazine (check it out here on page 12)! So exciting!

5. Camping next weekend